There is no need to spend hundreds of dollars for making ombre nails at high-end salons, these are not that tough to do at home.
So from now on, rather than spending so much money on ombre nails, buy a nail art kit at home. And I will teach you how to create beautiful ombre nails at home.
You might be wondering, is it really that easy to do ombre nails at home? And the answer is Yes. There are a lot of videos online from where you can learn to get the perfect ombre nails.
But if you are a beginner, you need a little extra help and guidance, and that is where we come in. Sit tight as we are going to show you the easiest ways to get the most beautiful ombre nails sitting at home.
Ombre Nails: A Step-By-Step Tutorial
Since you are a beginner it important to learn all the steps at first, and that is why I am going to talke you through a step by step tutorial on how to do ombre nails at home.
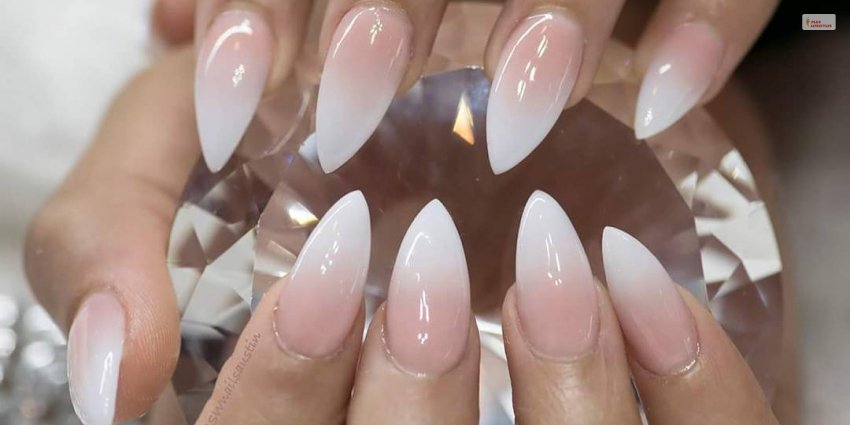
Today I am going to show you how to do the easy French ombre nails. It is one of the most easiest and simplest of ombre nails.
The Things You Need

Before you start doing your ombre nails, there are a few things that you need ot have. Here is a list of things that you need to know.
- Base Coat (A Clear Nail Polish)
- White Nail Polish
- Flesh-toned or Nude Nail Polish
- Liquid latex tape
- Nail polish remover
- A small brush or Q-tip
- Disposable makeup sponge
- Top coat
Now that you have collected all the things necessary for doing the ombre French nails, we can now begin making the nails.

Step 1: Apply The Base Coat
Before you start doing your long or short ombre nails, it is important to have properly clean and manicured nails. Now to protect your nails from any damage put a layer of base coat on top of your nails.
Step 2: Apply The Nude Or Flesh-Toned Nail Polish
Now apply about two coats of the nail polish on your nails, and ley them dry out. Make sure that the nail polish is not lumpy on any area.
Step 3: Apply The Liquid Latex Tape To The Cuticles
Now that the nail polish is dry, apply the liquid latex tape around your nails. This will ensure that your skin is protected from all the mess, since the latex would peel off quite easily. So after applying the lates tape, wait ill it drys out.
Step 4: Apply The White Nail Polish To The Sponge
Now take a disposable sponge and daba generous amount of nail polish on the tip of the sponge.
“Dip the sponge in water before painting the colors. Keep squeezing the sponge until 80% of the water is gone. This is because too much water can stop the sponge from absorbing much nail paint and cause the polish to dry on the sponge too quickly.”
Step 5: Apply The Nude Or Flesh-Toned Nail Polish To The Sponge
Dab a generous amount of the flesh-toned or nude nail polish below the sponge tip in order to create a gradient like effect.
Step 6: Dab The Sponge Onto The Nail
Now it’s time to hold the sponge in sucha a way that the white nail polish dabs on your nail tips only.
Step 7: Repeat Step 5 And 6
After the first layer is done, you can add more nail polish on the sponge and dab it on the desired areas of your nail.
Step 8: Remove The Liquid Latex Tape
After you are done with your desired design, now let it dry and then just peel of the latex tape from your finger.
Step 9: Apply The Top Coat
Lastly you need to apply the last coat on your nails to give your ombre nails a shiny look to it and also smoothen the nail texture.
Step 10: Gaze At Your Final Result
Now that all the steps are done, your ombre nails are ready as well. Though it is a simple ombre nail, but you can do more colorful ones later on, after a practices.
Wrapping Up!
Well now that you know how to ombre nails at home, you can now save about hundred dollars in order to get ombre nails from a professional.
This way the nails really do look great. So if you like then don’t forget to liike and also comment down below, on whether you wanna try hom ombre nails or not.
Have A Look :-


